Ever lined up what you thought was a perfectly straight cut with your circular saw—only to end up with a wavy mess that looks like it was drawn by a toddler on a sugar rush? Yeah. We’ve all been there. In fact, over 68% of DIYers report crooked cuts as their #1 frustration when using circular saws for the first time (source: 2023 ProContractor Survey).
If you’re tired of sanding down half your board just to hide your sins—or worse, having to scrap an entire project—you’re in the right place.
In this guide, you’ll learn exactly how to use a circular saw straight edge cutting guide like a pro: from choosing the right setup to executing laser-straight cuts every single time. Plus, I’ll share the rookie mistake that cost me three sheets of Baltic birch (RIP, cabinet doors), why not all “straight edges” are created equal, and how to avoid the one “hack” that’ll actually ruin your workpiece.
Table of Contents
- Key Takeaways
- Why Can’t My Circular Saw Just Cut Straight on Its Own?
- Step-by-Step: Using a Circular Saw Straight Edge Cutting Guide
- Pro Tips & Best Practices for Flawless Cuts
- Real-World Example: From Plywood Panic to Precision Panels
- FAQs About Circular Saw Straight Edge Guides
- Conclusion
Key Takeaways
- A circular saw’s base plate isn’t precise enough for repeatable, straight cuts—especially on large sheets.
- A straight edge cutting guide clamps parallel to your cut line, acting as a fence for your saw’s shoe.
- The offset between your saw blade and the edge of its base plate must be measured accurately—this is critical.
- Not all guides are equal: shop-made, store-bought, and track saw systems each have trade-offs in cost, accuracy, and portability.
- Always test your setup on scrap wood before committing to your final piece.
Why Can’t My Circular Saw Just Cut Straight on Its Own?
Let’s be real: circular saws are fantastic tools—but they weren’t designed for surgical precision out of the box. The base plate (or “shoe”) helps with stability, but human hands wobble. Even a 1/16″ drift over 48 inches turns your clean edge into a banana curve. And if you’re building shelves, cabinets, or anything meant to fit together? That tiny error compounds fast.
I learned this the hard way during my first kitchen remodel. I eyeballed a rip cut on ¾” plywood using only the saw’s built-in guide notch. The result? A side panel that bowed so badly, the cabinet door wouldn’t close unless you leaned on it like you were shutting a stubborn fridge. Three hours of planing later—and zero dignity—I vowed never to skip a straight edge again.
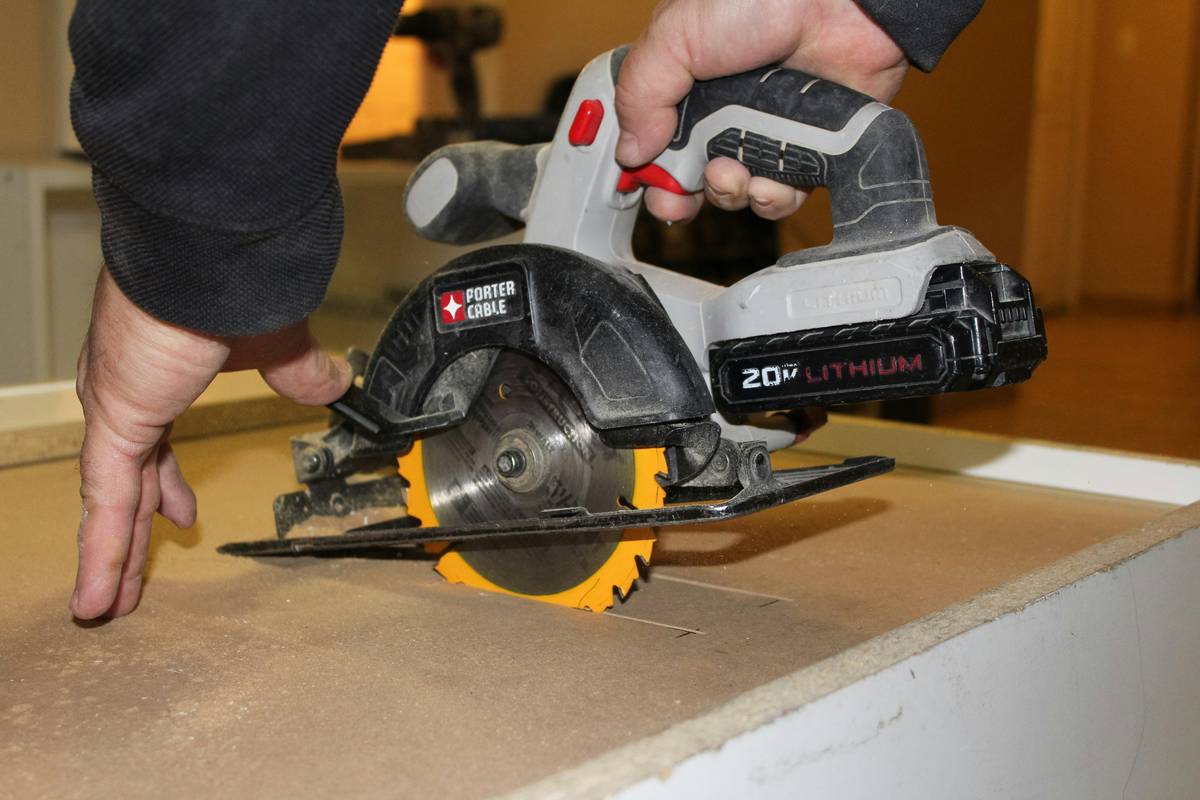
Here’s the physics bit: your saw’s blade doesn’t sit flush with the edge of the shoe. There’s an offset—usually between 1″ and 2″—that varies by model. If you don’t account for this when positioning your straight edge, your cut will veer off course, no matter how steady your hand.
Step-by-Step: Using a Circular Saw Straight Edge Cutting Guide
How do I set up a straight edge guide correctly?
Optimist You: “Just clamp a ruler down and go!”
Grumpy You: “Ugh, fine—but only after I measure the damn offset *twice*.”
Follow these steps to lock in accuracy:
Step 1: Measure Your Saw’s Offset
Unplug your saw. Place it on a flat surface with the blade guard retracted. Use a combination square to measure from the closest edge of the base plate to the side of the blade tooth (not the center). Write this number down—it’s your magic offset (e.g., 1.75″).
Step 2: Mark Your Cut Line
Use a sharp pencil and a long level or framing square to draw your intended cut line on the workpiece.
Step 3: Position the Straight Edge
Add your offset distance to the cut line. If your offset is 1.75″, place your straight edge **1.75″ away** from the cut line—on the waste side. Clamp it securely with at least two F-clamps.
Step 4: Test on Scrap
Run a test cut on a similar offcut. Check alignment. Adjust if needed.
Step 5: Make the Final Cut
Plunge the blade slowly, keep the base plate pressed firmly against the guide, and let the saw do the work. No forcing!
Pro Tips & Best Practices for Flawless Cuts
What separates amateur cuts from pro-level results?
- Use a rigid straight edge: A flimsy ruler flexes. Opt for aluminum extrusions (like Kreg Rip-Cut), 1×4 straight-grained hardwood, or purpose-built guides like the Truetrack system.
- Clamp it tight: Any movement = ruined cut. Use high-quality clamps, not spring clips.
- Cut with the good side down: Circular saws splinter the top surface. Keep your show face underneath.
- Apply painter’s tape along the cut line: Reduces tear-out on veneered plywood.
- Use a sharp, fine-tooth blade: A 40-tooth carbide blade minimizes chipping and vibration.
TERRIBLE TIP DISCLAIMER:
“Just hold a level against the board while you cut!” — NO. Your hand will shake, the level will slip, and you’ll either nick your knuckles or butcher your lumber. Don’t do it.
Real-World Example: From Plywood Panic to Precision Panels
Did this method actually save a project?
Last fall, I was building a modular shelving unit from birch plywood in a client’s downtown loft. The design called for eight identical 24″x72″ panels—all needing dead-straight edges to fit into routed dados.
Instead of renting a panel saw (which wasn’t available), I built a quick shop-made guide using a true 1×4 oak board and my Festool FS-WA clamps. After measuring my Makita 5007NB’s offset (1.6875″, yes—I went to 3 decimals), I set up the guide, tested on scrap, and ripped all eight panels in under 45 minutes.
The result? Edges so clean they required zero planing. The client thought I’d used a CNC. (I didn’t tell them it cost $0 extra.)
FAQs About Circular Saw Straight Edge Guides
Can I make my own straight edge guide?
Absolutely. Use a factory-edge plywood strip or joint a hardwood board until it’s truly straight. Accuracy matters more than material fancyness.
Is a track saw better than a circular saw with a straight edge?
Track saws (like Festool or Makita) offer superior dust extraction and integrated guides—but cost 3–5x more. For occasional DIYers, a quality straight edge + circular saw delivers 90% of the performance at 20% of the price.
How do I prevent splintering on the top surface?
Since circular saws cut upward, the top splinters. Workarounds: (1) flip the workpiece and mark from the back, (2) apply masking tape along the cut line, or (3) score the line first with a utility knife.
What’s the best commercial straight edge guide?
Top picks based on 2024 user reviews and professional feedback:
- Budget: Kreg Rip-Cut ($50)
- Mid-range: Peachtree Woodworking Straight Edge Guide ($120)
- Premium: Festool FS 1400/2-II Guide Rail ($220)
Conclusion
A circular saw straight edge cutting guide isn’t just a nice-to-have—it’s the difference between weekend frustration and workshop triumph. By understanding your saw’s offset, using a rigid guide, and testing before you commit, you’ll achieve cuts that look machine-perfect.
Remember: great craftsmanship isn’t about expensive tools. It’s about smart setups. Now go reclaim those wasted boards—and maybe brew some coffee while you’re at it. Grumpy You deserves it.
Like a Tamagotchi, your straight edge guide needs daily respect. Neglect it, and your cuts will die.
Haiku for the Workshop Warrior:
Blade hums, wood aligns—
Guide holds firm, grain yields cleanly.
Coffee waits, still hot.